When you click List in FogBugz, you don't see every single case in the system: you only see cases that match your current filter.
Your filter is remembered until you change it, even when you log on from another computer or browser.
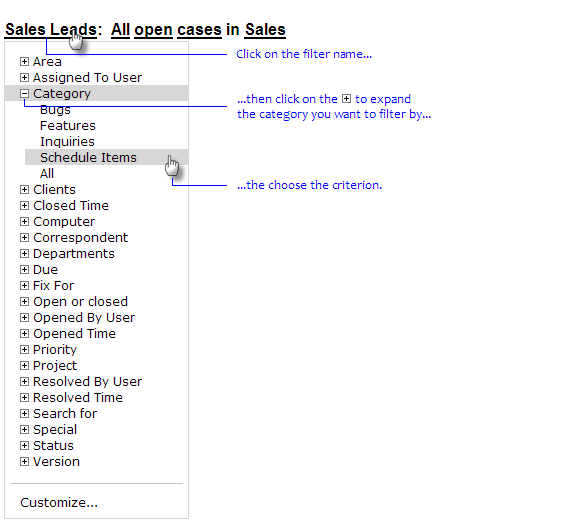
To see fewer cases, you can refine a filter, adding a criterion, by clicking on the name of the filter:
You can search within filters by expanding the "Search for" option.
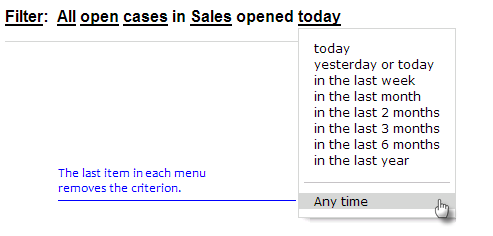
To change or remove a criterion, click on the underlined term:
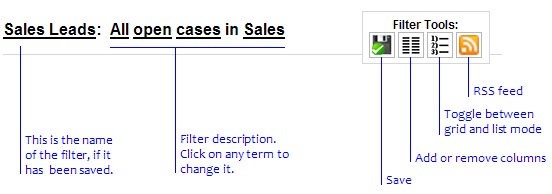
Four filter tools are always available.
When you are looking at a list of cases in grid view, you can:
Rearrange columns, by dragging the column header left and right.
Sort by a column by clicking on the column header; reverse sort by clicking it again.
Tip: To sort by two or three terms, click the column headers in reverse order. For example, to sort by area first, and by priority within each area, click on the Priority header and then the Area header.
Change the width of a column by dragging the thin gray separator between two column headers.
Autosize a column to the minimum width necessary to show everything, by double-clicking on the thin gray separator to the right of the column header.
Saving a filter also saves everything about the corresponding column layout, including the columns, column width, and sort order.